

WordPress and it’s WooCommerce online store plugin are two applications that work together to power almost 40% of all e-commerce stores on the planet. This figure sums up to over 1.5 million stores and still counting.
The first thing we need to understand is that the comfort of purchasing items online and advancements in technology that makes online transaction secure has increased the worldwide acceptance of e-commerce so online store creation is the right thing to do in order to promote your online presence, products and values.
That’s the reason why starting an online store remains one of the best ways to make money online. You too can start an e-commerce store even if you have minimal web design experience.
The best part of it is that setting up an online store in WooCommerce is simple with our guide that shows you how to do it.
This guide provides a step-by-step guide on how you can use the power of WordPress and the WooCommerce plugin to build your e-commerce site within an hour! We designed this guide to be newbie-friendly; we will teach you everything you need to create an online store and add your products. Besides the technical aspects, we also provide design tips and strategies to promote your site and make sales.
The first step is to register a web hosting account, follow this link to get excellent e-commerce hosting (WordPress + WooCommerce, and it’s non EIG). Continue reading the next steps to set up your online store.
Start an online store with WooCommerce >>>
What is eCommerce? Introduction to Online Stores
E-commerce which is the acronym for electronic commerce is a term that describes the procedure of buying and selling goods and services from online platforms. You probably have purchased physical products or services online; that is e-commerce at work.
E-commerce has tremendously developed over the years such that you can purchase virtually anything online. You can find several online stores selling ranging from digital items like eBooks, to cheap things such as pencils, and expensive real estate.
The truth is that whatever the product you want to sell online, there will be competitors. But the good news is that the market is quite vast, you can start your online store today and do quite well. Just follow the guide we provide and put in some hard work. You will give your online store an edge when you create it with the best tools available in the industry. Don’t be afraid, these tools are mostly free.
Why WordPress Is the Best Choice for Your Online Store?
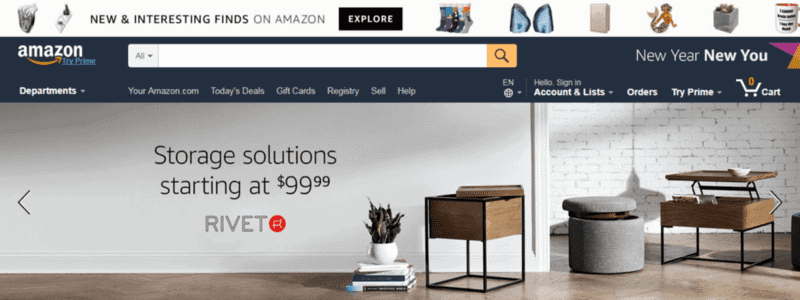
Although there are other options for selling your products online such as using third-party marketplaces like Amazon, most people cut their teeth on e-commerce by starting their own online store. Since the online store is a type of website, one of the vital decisions you have to make is the website platform to use.
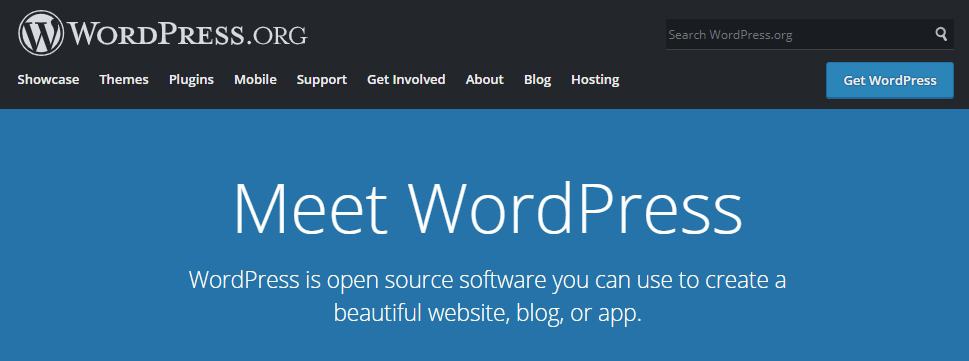
If you are yet to decide on a platform for your website, we would recommend WordPress. It is a free platform with many excellent features you can use to create any type of site. Besides, it is a user-friendly Content Management System (CMS) that is perfect for beginners and experts alike.
The WordPress platform began as a blogging application but had seen several advancements over the years that makes it adaptable for any type of site. WordPress has been used to build news sites, corporate websites, job sites, and many more. WordPress is the preferred choice for e-commerce websites for many reasons. Some of these advantages are listed below:
- The platform has thousands of design themes and plugins that you can use to tweak a site for your preferred visual design and other programming functions. The several add-on tools for e-commerce make it a perfect choice for building online stores.
- WordPress has an active community that continuously adds new features through updates and provides timely patches for security threats when they arise. You would likely want to choose a secure platform to build your online store since you will be dealing with sensitive data.
- E-commerce can be tricky and you need all the help you can get when you get stuck. With the vast community of WordPress users out there, you can never be short of support when you need a hand. There are a vast amount of resources online, and forums that provide answers to your pressing questions.
We can assure you that WordPress is robust enough to handle the requirements of your online store. However, it is important to note that WordPress CMS does not have e-commerce functions. But you can get your online store up and running when you install the right e-commerce plugin on your WordPress website.
Introducing WooCommerce – eCommerce Solution for WordPress
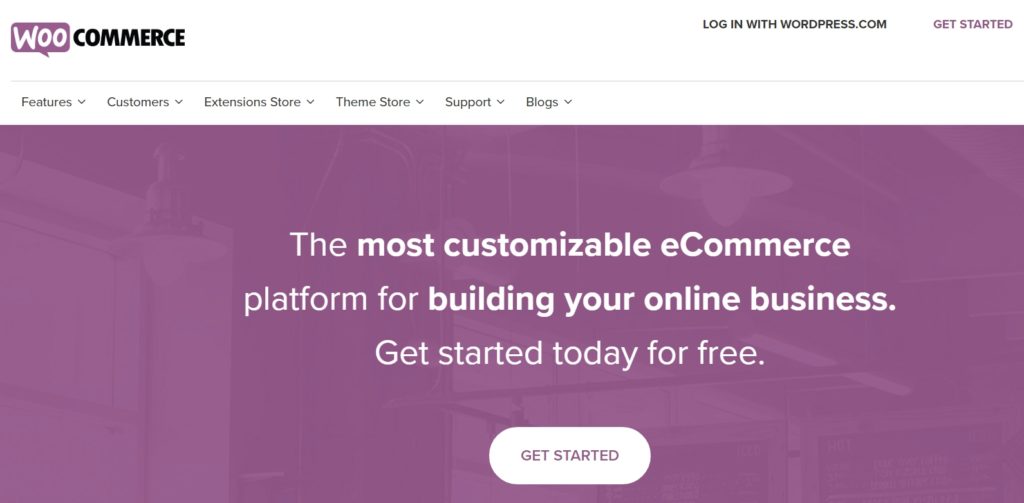
WooCommerce is the most widely used plugin for adding e-commerce features to WordPress websites. The user-friendly features and many useful functions of the plugin are important reasons why it is preferred to other online shopping plugins in WordPress.
After you have installed and activated the WooCommerce plugin, it automatically adds several features that allow you to create an online shop in WordPress. Basically, these features include product listing backend, online shop frontend, shopping cart, checkout options, and an online payment system. There are additional useful settings that allow you to customize your online shop to achieve your unique objectives.
With WooCommerce, you can sell both physical products and digital items, it’s your choice. The platform is robust enough to handle sales of a handful of downloadable items in your online shop and will continue to function well when you upscale to selling hundreds of products per day.
WooCommerce Primary Features
The main features of the WooCommerce plugin are as follows:
- It adds a backend to your website where you can add products to your store and set their respective prices.
- It allows the store owner to create dedicated frontend pages for each product or service offered.
- Addition of checkout feature to the website such that the user can make payment for items or services they purchase.
- Addition of flexible options for payments and shipping of physical goods.
Start your hosting with WooCommerce eCommerce solution >>>
What Does It Cost?
With all the excellent features described above, you must be thinking that the plugin will require a premium subscription to use. Well, the core WooCommerce program is absolutely free.
However, you can add other excellent features to the program by purchasing extensions from the WooCommerce extension store.
First Steps Before Building Your Online Store
Before we take you through the step-by-step procedure for building your online store, you will need to put two things in place. The first is to get a domain name, and the second is to purchase a web hosting plan.
First of all, register you’re hosting with DreamHost >>>
Most of the service providers will help you register your domain name and also provide a hosting plan for you. Bear in mind that you will need to pay for these services upfront and renew them annually. The cost of domain name and hosting are usually affordable.

Just like the name refers, the domain name is simply a name by which your website is known on the internet. It is more like a business name that you register in the real world. You should pick a name that is easy to remember and contains keywords related to your business. You should take the time to choose a name that you are satisfied with because changing it later can be complicated.
Your web hosting is more like the offline shop you rent for your business. Only that this time around, it is a digital space and resides on the Internet. This space is where you store your files and design your website. The hosting server makes your online store available to people around the world through the Internet. There are many options for web hosting, but you would like to choose the ones with high performance, fast loading, and a reputation for excellent security features.
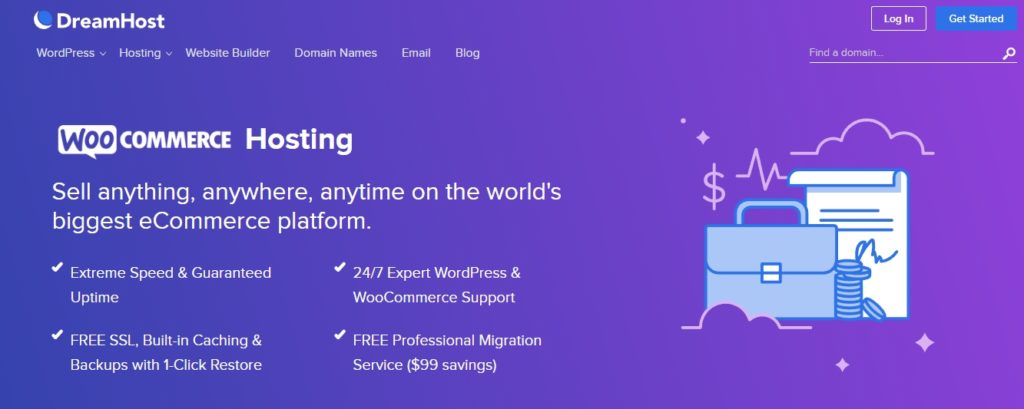
Technical support is another feature you want to double-check with your prospective hosting service provider. They must be available to provide support on time when you need it through various media like telephone support, chat, and online ticketing system. You should also look out if the hosting provider has a dedicated WooCommerce hosting plan. Such a plan is optimized for an online store on the WordPress platform. It also contains other useful tools to manage and upscale your store when the needs arise. And of course, they give priority support.
Start with DreamHost, a reliable WooCommerce hosting >>>

We need to take the time to discuss security before proceeding with this guide. It is essential to keep your online store safe from hackers and infections from malware. You will also be protecting your business because nobody wants to transact in an insecure site. To this end, it is crucial to install a Secure Socket Layer (SSL) on your e-commerce website hosting. SSL is an encryption technology that secures your private data and the financial information of the users of your site. After installing the certificate, your website will use the HTTPS URL prefix to open pages.
You can obtain an SSL certificate from an external source, but your hosting provider can also provide one for you. The WooCommerce hosting plan we use adds a free Let’s Encrypt SSL certificate to the hosting plan to make our site secure right from scratch. SSL is recommended for any site that requires a login, and it is absolutely compulsory for an e-commerce website.
Start hosting with DreamHost, WordPress hosting with free SSL certificate >>>
Start Your Online Store in One Hour
After choosing a domain name and subscribing to a web hosting plan, you can now proceed to the next step of building your online store. Follow the comprehensive guide below to start designing your e-commerce website.
Step 1 – Install WordPress (5 Minutes)
The first step is to install WordPress which is the CMS that will power your website. If you choose the DreamHost WooCommerce plan or the DreamPress plan, you can skip this step because you already have WordPress preinstalled for you. But for a regular hosting plan, you will have to install WordPress on your web hosting server manually.
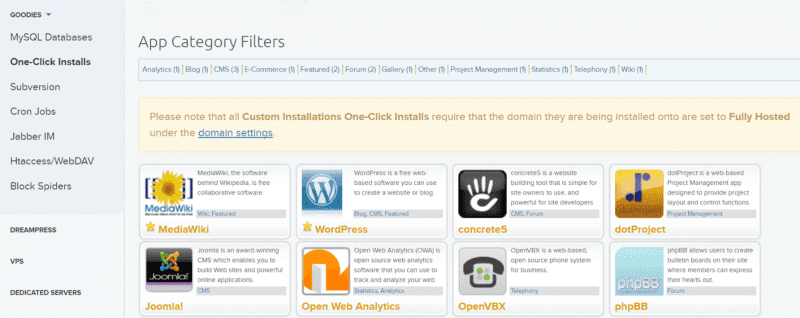
To install WordPress, you will have to log in to your web hosting server control panel. DreamHost makes the process easy with One-Click Install future. If you are using a DreamHost web hosting plan, you can access the One-Click WordPress install by browsing Goodies > One-Click Install within the hosting control panel.
Begin online store with WordPress and WooCommerce >>>
Click on the WordPress icon on the following page and fill out your domain name in the required field. You can leave the default value in other fields because they contain advanced options that you do not need to tweak anyway. When you check the Install Deluxe options, additional themes and useful plugins will be added to the installation. When you are set, click on the “Install it for me now” tab to start the WordPress installation.
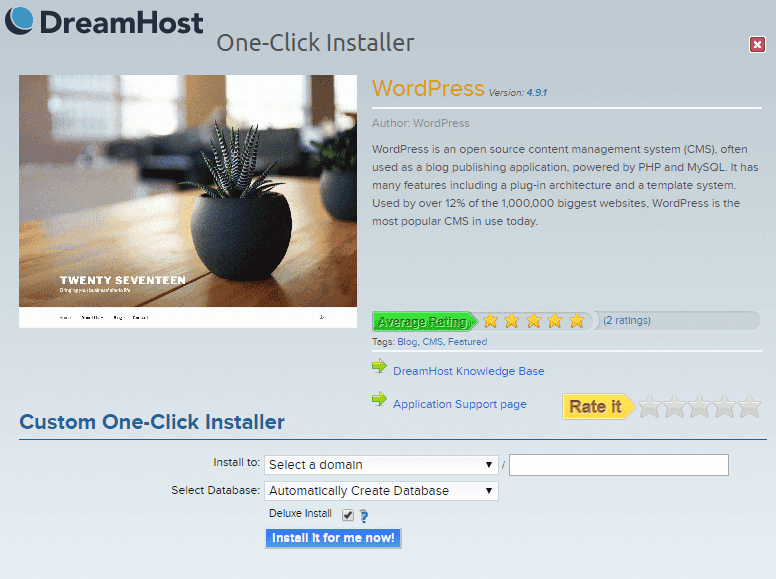
When the installation is complete, the application will send the login details of the WordPress Admin backend to the email you used for your hosting account.
In some rare cases, you will be required to install WordPress manually when the hosting provider does not have automated scripts for a WordPress installation. Going through the manual installation route involves a couple of steps and creating a database. Don’t be scared, it’s not complicated and will take about five minutes to complete.
Step 2 – Install WooCommerce Using WordPress Admin Panel (10 minutes)
You may be able to skip this step also if you choose to use the WooCommerce hosting plan from DreamHost. Because the plan comes with preinstalled and preconfigured WooCommerce so you can start building your store right away when you log in to your WordPress Admin area.
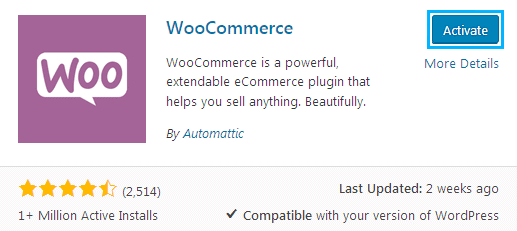
However, we shall still go through the procedure of installing the WooCommerce plugin for the benefit of those who use an ordinary hosting plan. Log in to the WordPress Admin area, click on the Plugin section in the admin menu and click on “Add New.” At the top of the page that opens.
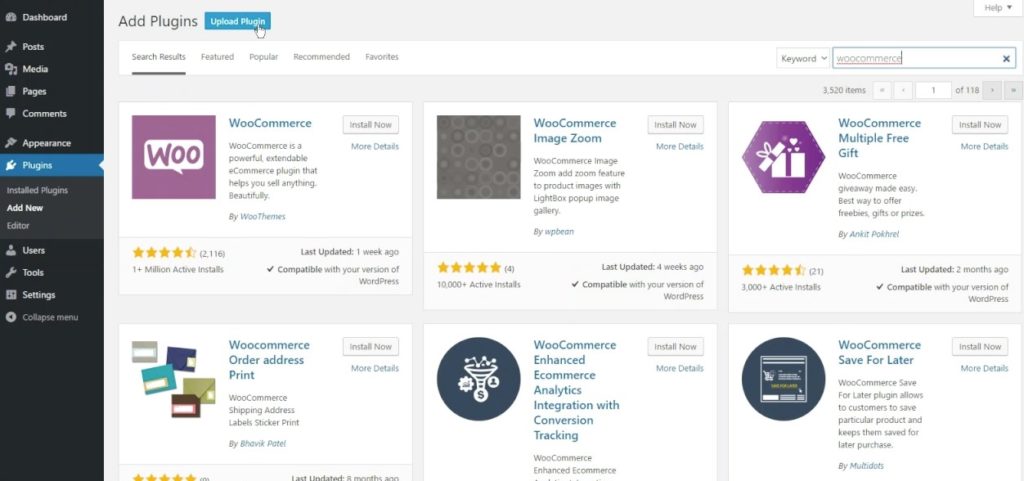
Locate the search box at the top of the page, type “WooCommerce” and press enter. Locate the WooCommerce plugin in the search results, and click on the “Install” tab beside it. When the install tab changes to “Activate” click on it.
Congratulations, you have just finished installing and activating WooCommerce on your WooCommerce website!
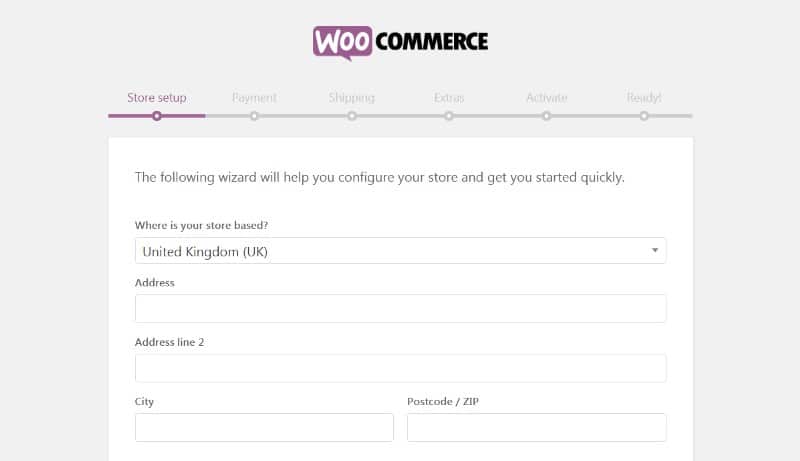
Now that the plugin is installed and activated on your site, you have all the essential pages that your online store needs to operate and sell your stuff. But we still recommend navigating through the WooCommerce setup wizard to fine-tune and configure important settings for your online store.
The Wizard will pop up after activating the plugin. The first phase of the wizard allows you to set vital details about your online store such as the currency and the products you plan to sell.
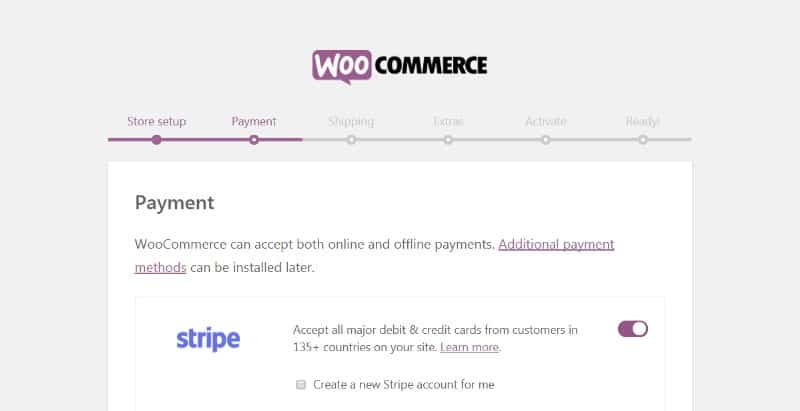
The next stage walks you through setting up the payment options you want your customers to use. Most shop owners choose a combination of Stripe, PayPal, and offline payment methods.
For some store owners, these options may not be adequate, but there are several other payment integrations available through WooCommerce extensions.
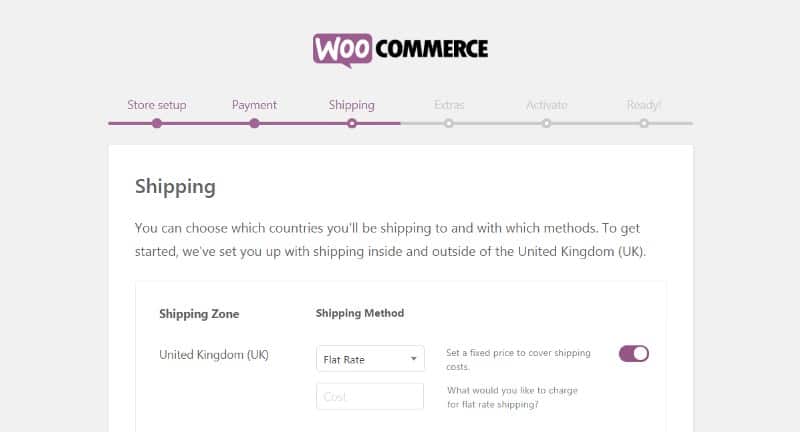
The next stage of the wizard allows you to configure standard shipping rates. The settings will enable you to charge a flat rate or provide free shipping. You can use the extension apps to have more flexible shipping options.
You can configure additional settings in the other two phages of the configuration wizard. However, you can safely skip these options to the end. You should also bear in mind that you can modify all the settings applied by the wizard when the need arises.
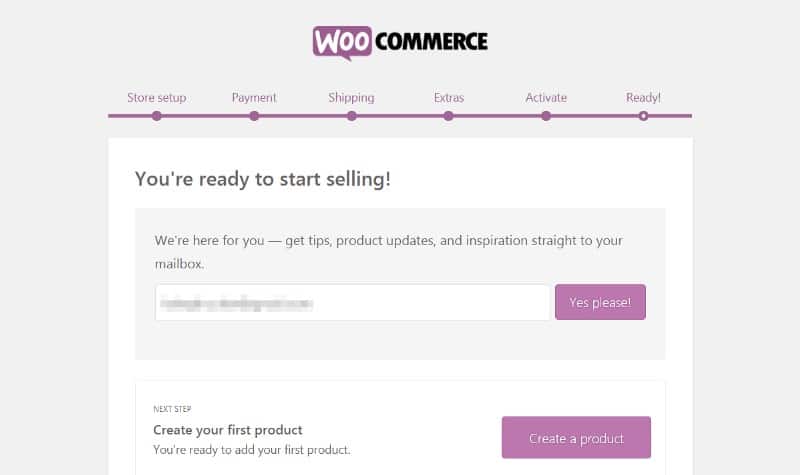
Once you are finished with the settings, the wizard informs you that you are ready to start selling. It also provides you with some quick links to adding products to your online store.
Before then, it is essential to optimize the WooCommerce store a little further. So, let’s return to the WooCommerce dashboard.
Step 3 –
WooCommerce Store Settings Optimization (20 Minutes)
Although the configurations you did with the WooCommerce Wizard can help you get a functional store, there are still many other settings you have to configure. So, we are going to spend some time tweaking the configurations of the store to cater to your unique requirements.
So, navigate to the WooCommerce menu and click on Settings.
There are many configurable options in the WooCommerce settings, but we will only focus on the most important ones.
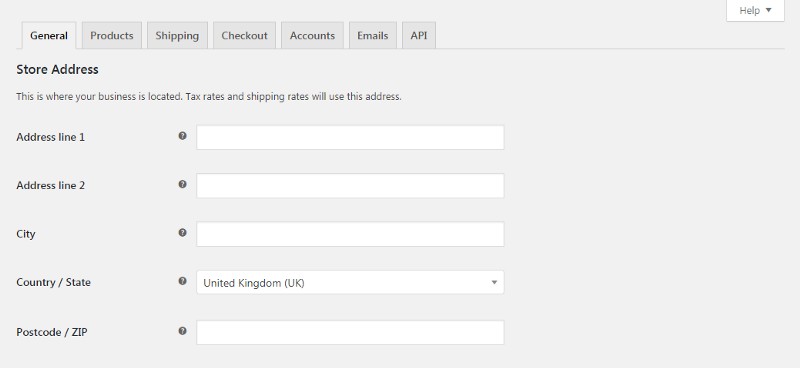
Do you want to ship to all countries? If not, navigate to the “General” tab and choose the countries you are willing to send your products. You can also decide whether to compute taxes on items purchased or not.
It is smart to add taxes to your prices because you may have to pay the sales taxes yourself if your buyers did not pay them while checking out. If you are not conversant with sales taxes, you can take a look at the WooCommerce developer tax guide here.
Next, let’s look at the “Product” tab. Here you will see some of your input from the configuration wizard. You will also see many additional options which you can tweak such as reviews.
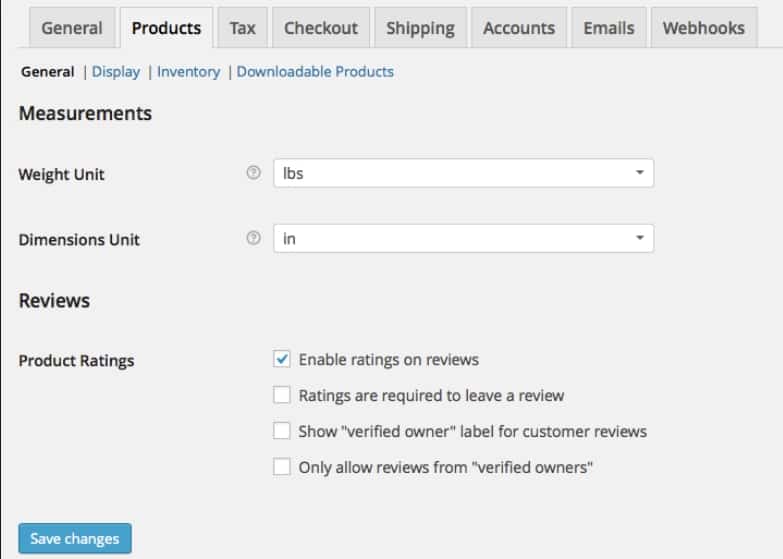
The review options allow your customers to leave a one to five-star rating on the product they purchase and also write reviews. Positive reviews are great for driving sales so you may wish to enable this option. The additional options here help you manage inventory and customize the way your products are displayed.
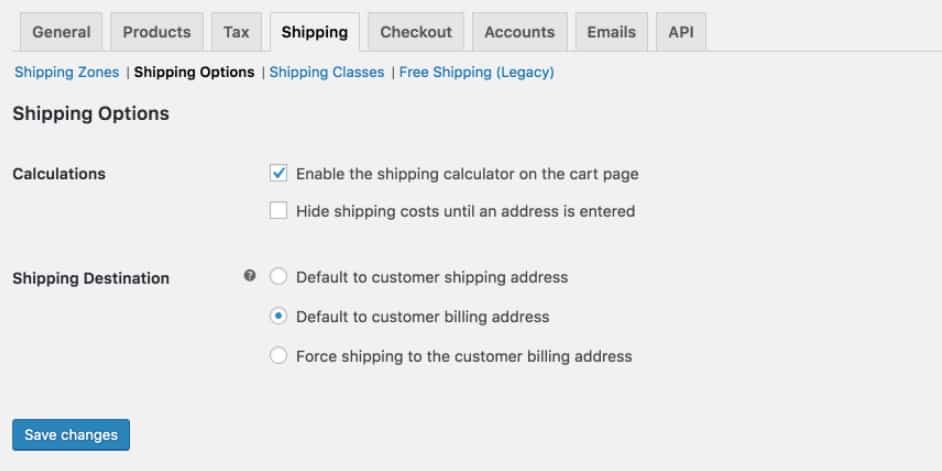
From the “Shipping” tab interface, you can add additional shipping zones, and customize the shipping methods and the rates you charge. The Shipping Options submenu also enables you to fine-tune your shipping procedures.
Next is the Checkout tab. From here, you can configure how the check out process will work and decide whether you want to use coupons or not. You can also change the order of the payment options by dragging the options into their right places.
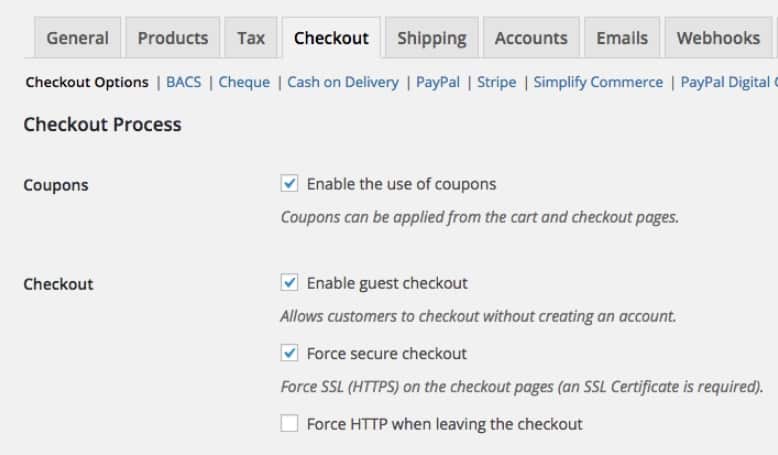
There are other subtabs where you can enable and configure the unique settings for each payment option and also add additional ones as the need arises.
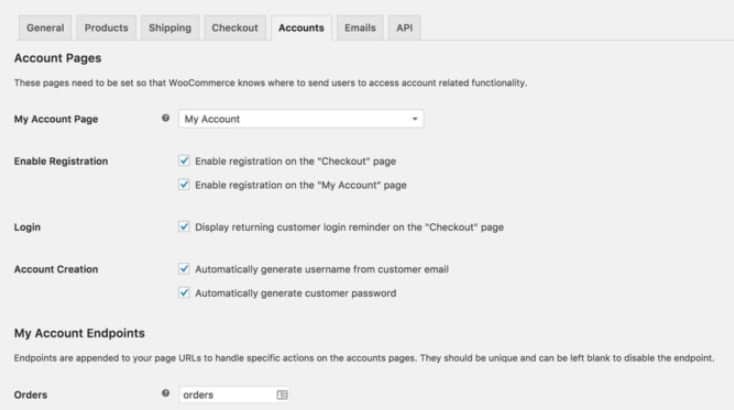
The accounts tab allows you to set the accounts policy for users who will be buying stuff from your website. Do you want them to register before they checkout or they can just check out directly? You can set all the options from here.
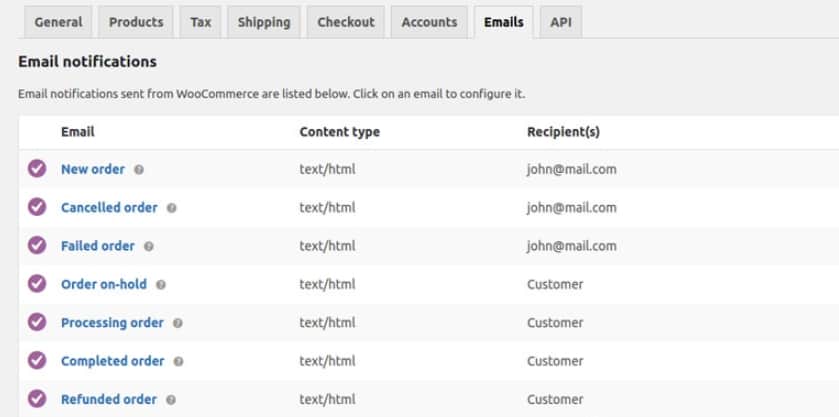
The emails settings allow you to customize the types of event notifications that you will receive in your registered store email. You also have the option to personalize the emails that your customers will be receiving from your store.
As for the last tab, the API one, it contains additional technical settings for advanced users to integrate with their custom store applications. You do not need to use this setting at all.
At this stage, you have completed customizing of the WooCommerce settings. You can come to the dashboard at any other time to tweak the store settings when the need arises.
Step 4 – Adding Products to Your Store (45 Minutes)
After you have set up your store the way you want it to work, the next step is to start adding your products to the store. The process is easy, just navigate to the “Products” menu and click on the “Add New” link in the dashboard.
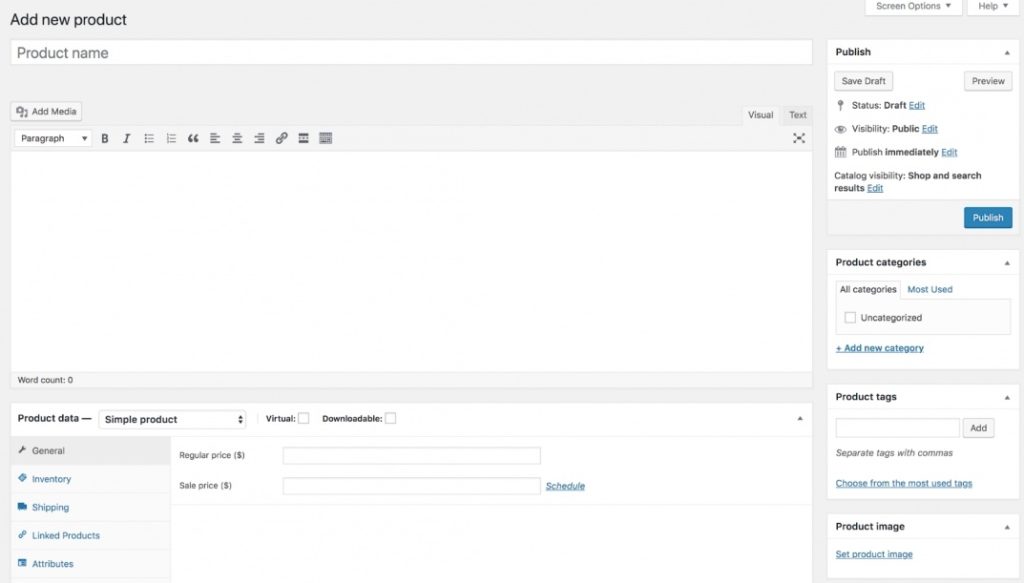
The product page is identical to the typical WordPress post page. It contains the standard editor and other few additional options and user-defined settings.
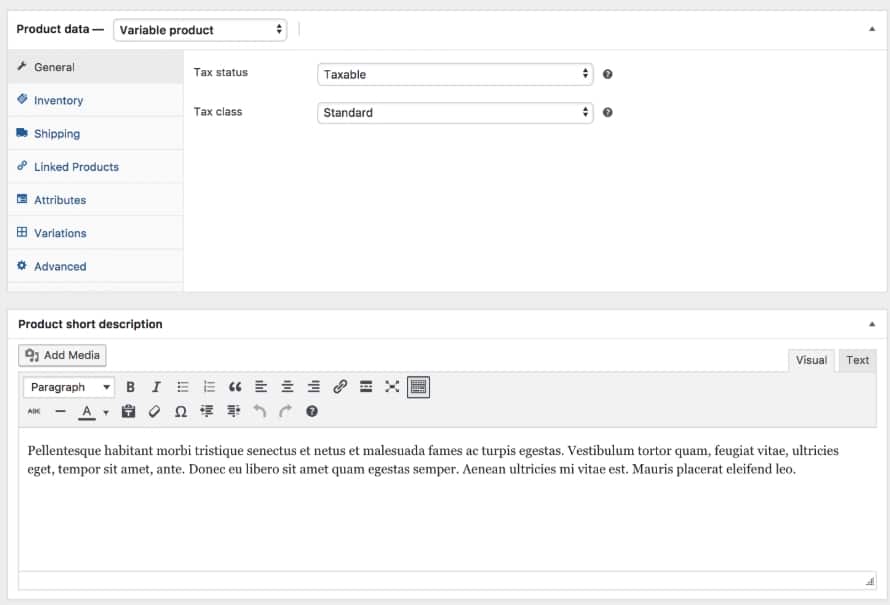
At the lower part of the page, you will see the “Product Data” section. Here you can set the details of the product such as price and whether it is a physical good or downloadable product.

The Inventory tab allows you to create a unique identifier for the product called the SKU and other options. At the shipping section, you can enter the product dimension, weight and choose the appropriate shipping class where applicable.
The linked product tabs allow you to upsell other related products to your buyers. It is a smart method to increase earning per transactions in your online store. Other options such as Attributes and Advanced are optional, so you can safely leave them out.
At the bottom of the page is the “Product Short Description” section where you can add the summary of the product. This is the text that shows up in the product listing page. The content should be brief and emphasize the selling point of the product such as the problem its solves and other benefits it provides to the buyer.
You can write the full description of the product when you scroll back up to the main editor. It is essential to highlight the main features and other information that helps the buyer make a decision.
The image of the product is one of the most vital parts of a product listing. Click on the “Add Media” button and upload a clean and clear image of the product.
Usually, it is best to upload several images from several perspectives to allow a 360-degree view of the product. An excellent view of your product imagery is vital to driving sales.
Use the product image section at the right-hand column to enter the main image. Below the section is an option to create a product gallery. The gallery section is excellent for products that have style and color varieties. This is the place where you can also add Categories and Tags to your product.
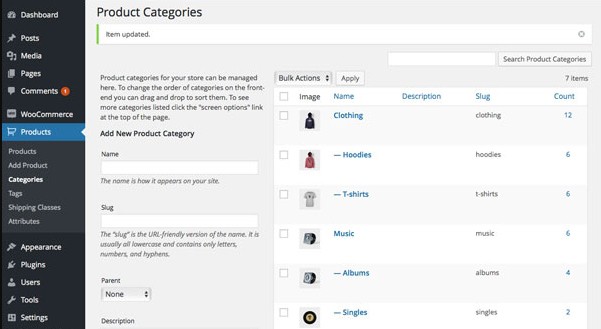
Categories and Tags are excellent avenues to get your product organized. It also allows the search engines bots to discover and classify your product accordingly. Besides, your customers are also able to find your products easily.
After you have uploaded your products and set all the necessary options, it’s time to go live and make the product available to potential buyers. Click on Publish, and your product will be available to buyers in your store frontend. Repeat this process for all your products to add other items to your online store.
Step 5 – Picking the Right WooCommerce Theme for Your Online Store
Now that you have finished setting up your store, it is time to start selling your goods. WordPress has a unique advantage when it comes to creating a unique visual design for your store. You have access to thousands of WordPress themes which you can use to customize the appearance of your store.
However, it is important to use a theme that is designed for WooCommerce. These type of themes have features that align with the functions of the WooCommerce plugin. They also offer additional elements that enhance the e-commerce functions of your site.
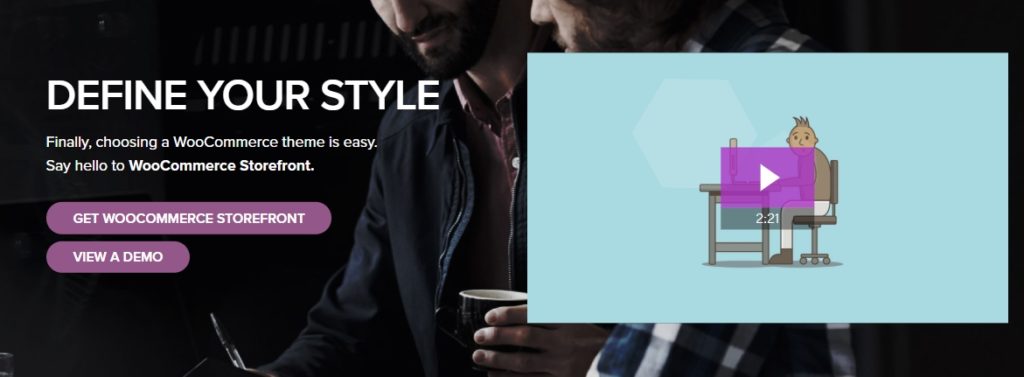
Most store owners prefer to use Storefront which is the official theme of WooCommerce. The theme is designed for WooCommerce, so it integrates with the plugin seamlessly. It also provides features that allow the store owner to customize the site to align with their corporate brand. Although Storefront is free, it has premium add-ons that can provide additional useful enhancements.
The official WooCommerce theme is Storefront, it is an excellent theme that provides all the features that most e-commerce sites need, and it’s preinstalled as a bonus when you sign up for DreamHost’s WooCommerce hosting plan.
There are many other themes that you can use if you do not like the visuals and features of Storefront. Premium theme vendors such as Themeforest has various themes designed to work with this plugin. It is essential to take the time to choose a theme that provides the features you need. The right theme can go a long way in helping you succeed in your e-commerce venture.
WooCommerce Tips to Boost eCommerce Sales

This guide will not be complete without mentioning the importance of your store design. When you have the Storefront theme installed on your WooCommerce website, you get an elegant looking store. However, you should take note of the following when tweaking the appearance of your site.
Brand your Store. You should maintain a consistent brand for your store. This should include consistency in color scheme, logo, tagline, typography and many more. You can learn more about developing abrand for your business here.
Focus on easy navigation. You should make it easy for people to find your products through the navigation menu. You can also add a search bar and categories for your products. If your customers can’t find their choice products easily, they will probably leave for another store.
Use Images optimally. Make sure you optimize your images to be of high quality and also of small size. This will allow you to display quality pictures across your entire site without slowing down your page load time.
Focus on your store. It is essential not to distract the attention of your website visitor so they can focus on the online store. Avoid cluttering your website with irrelevant information; a minimalistic design is the best approach for an online store.
How to Promote Your WooCommerce Store
A tutorial that teaches e-commerce is not complete without providing tips on how you can promote your online store. It is naive to think that buyers will stumble on your site in the search engines. You should put your product or service in front of a buyer audience through active marketing activities.
Promoting your online store can be complicated; many store owners swear by various marketing methods as the holy grail of online marketing. However, you will have to discover what works best for you by trying a combination of multiple marketing methods. You can use the resources below to learn more about the various methods.
Pay-Per-Click advertising: This method involves paying a search engine (Google, Bing, etc.) to display your website when a user searches for a keyword related to your product. They can also show your advertising on relevant sites. You can choose to pay when a prospect clicks on your ad (PPC) or pay for every thousand ad impressions (PPM). Learn more about pay per click marketing here.
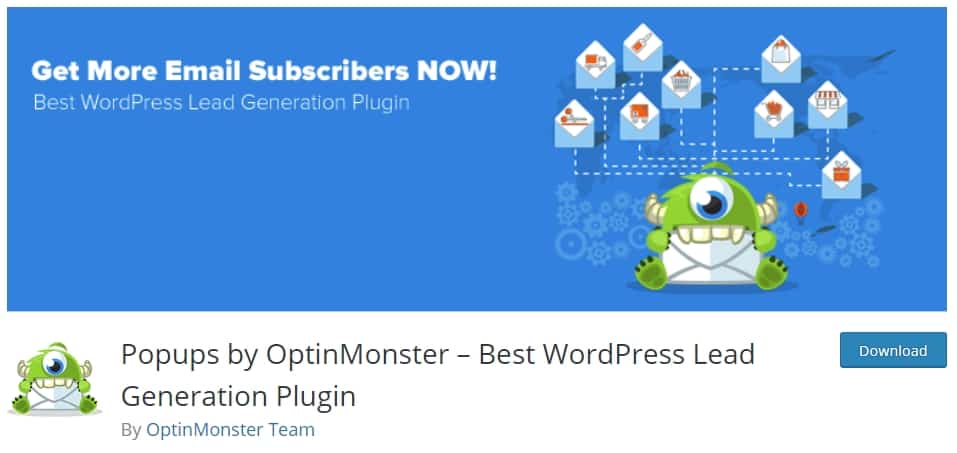
Email marketing: Another effective method of website promotion is email marketing. In this method, you capture the email address of those interested in your product or services and send them valuable tips and marketing emails. You can build an email list from your website by using a plugin like the Opt-in Monster.
Social media marketing: The huge number of people that login to social media platforms every day makes it a perfect platform to market your product to potential customers. You can follow this guide to choose a social media marketing approach for your store. The most platforms provide information about interests and demographics that allows you to target your audience.
Discounts and promotions: Everybody likes discounts, its no surprise that shops make record sales on Black Fridays. You too can cash in on this buyer psychology by organizing promotions and using coupons to get the word out about your online store. WooCommerce has features to use discount strategies on your website.
Do bear in mind that website promotion places a demand on active and consistent efforts on your part. The baseline is that you get better results when you use multiple marketing methods to bring more people to your online store. You should promote your online store continuously and track your results to see the advertising media that brings you the best ROI.
A Final Word, Build Your Own Online Store!
You can set up an online store within a couple of hours, thanks to the various useful tools in the e-commerce world of today. Since there are many competing stores, you should put in some hard work to make your store stand out from the crowd.
Remember, you should continuously work on your store and tweak it to convert your visitors to buyers. Perfecting your in-store conversion and online promotion techniques are crucial to the success of your e-commerce endeavors and your online presence.
Start an online store with WordPress and WooCommerce >>>
WordPress and WooCommerce provides an excellent way to make an entry into the profitable world of e-Commerce. Pick a domain name and get a hosting plan to get started today. Let us know in the comment section if you have questions about creating your online store using WooCommerce.
My website is hosted on DreamHost which I really like due to its stability and helpful support. Furthermore, their servers are extremely reliable, secure and fast, I don't remember when the last time we had a server downtime. If you sourcing for a great hosting service, go grab it.
- 10 Best Programming Languages For Web Development - February 27, 2024
- Expert Tips to Speed Up LLC Approval Times in Massachusetts - February 7, 2024
- Top 10 Mistakes to Avoid in Your HVAC Certification Exam - January 6, 2024